How to take wildlife photos like a boss this summer

SLIDESHOW: Hover over the images below and click the arrows to scroll through the images
My late father-in-law loved making photographs and kept them all, no matter how bad. We once suffered through 400 slides of “Our Trip to Spain” where many were prefaced by disclaimers like, “You can’t see because it’s so dark,” or “That gray blob the size of a pea is a monk.”
His biggest handicap as a photographer wasn’t his eye, which was actually very good, but the equipment available in the 1960s; manual film cameras with short lenses and no built-in exposure compensation or autofocus.
Photography has advanced incredibly in the ensuing 45 years. For less than $400 people can buy digital superzoom cameras capable of making photos that would grace “National Geographic,” if they learn to use them properly.
People who see my photos and videos sometimes ask, “What’s the best camera for wildlife?” My answer is always, “The one you have with you.”
I’m not being a smart ass, just pointing out that a picture from an inexpensive camera is better than no picture (at least, usually). So the first rule of thumb for outdoors photographers is to keep a camera handy. When it’s not possible to carry it, keep it in the car or boat.
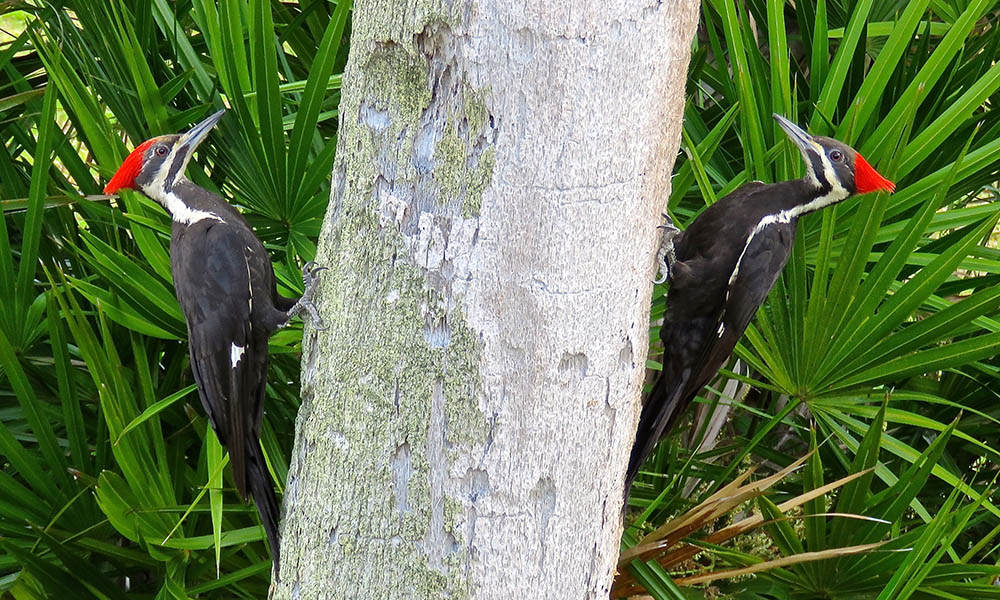
The photo of the pileated woodpeckers with this story was made as my wife and I were driving in Florida and came to a stop sign. Susan said, “Look at that,” and I turned to see the birds on a tree 15 feet away.

I grabbed a Canon superzoom that usually rides between the front seats, rolled down the window and got off a dozen shots before another car came up and spooked them. Those pictures were sheer serendipity.
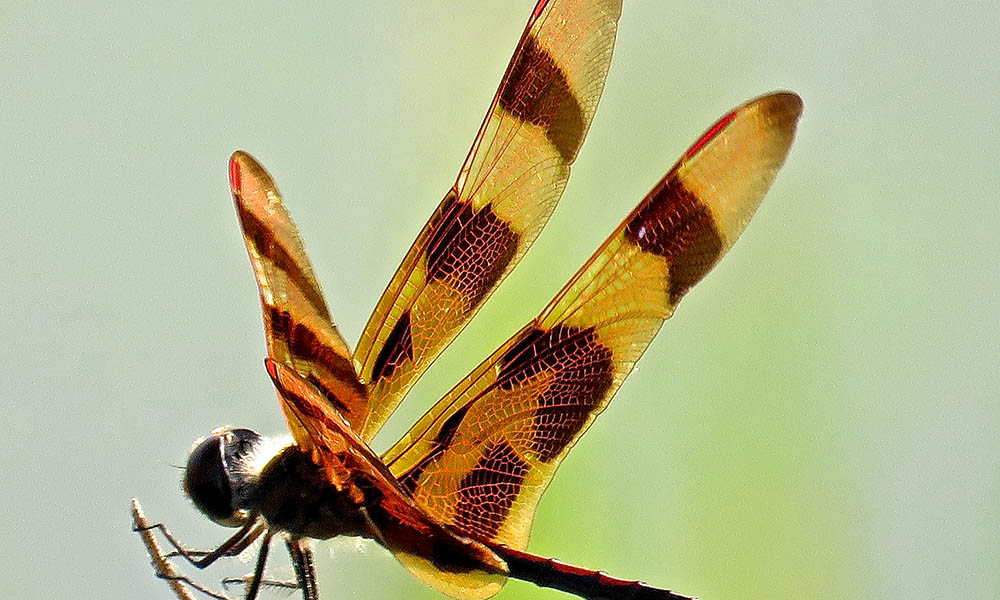
The dragonfly photo is a different story. There’s a place they like to hang out and hunt on sunny afternoons, and last summer I stopped there for a few hours about 20 times over two months. The result was hundreds of out-of-focus, poorly exposed or badly-framed dragonfly pictures, but among them were a dozen good images.

Whether it’s a lucky snapshot or an image won by careful thought and preparation, the next six months are when people have the best shot at making good pictures in the woods and on the waters ‒ with the right kind of camera.
Everyone can make an excellent wildlife picture sometime, but amateurs who think they can consistently make stills and videos like those that appear in “National Geographic” and BBC nature films are being unrealistic.
Those images are usually the result of following a subject for days or months with cameras and lenses that cost $20,000 on up (the tripods alone can top $5,000.) But if your aim is to make 8-by-10 photos you can hang on the wall, or quality videos to show on an HD TV, your odds have increased by orders of magnitude in recent years, thanks to affordable superzoom cameras.
I own a couple of professional cameras that sell for $1,500 for the body alone, which is the bottom end of the pro range, and several lenses that cost $500-$1,200, also relatively cheap in professional terms.
Yet all the photos for this article were made with Canon cameras costing far less: a 12-megapixels SX50 and 16-megapixel SX60, which cost about $400. They’re among several modestly-priced superzooms from great manufacturers that offer the 40-to-90-times magnification needed to get quality images at long distances ‒ if you practice and learn some specialized techniques. Here are a few features to consider:
Zoom lenses
The big problem with wildlife photography is that the life we want to photograph really is wild. Most animals don’t like other kinds of animals getting too close. So making good wildlife pictures usually means learning to move quietly, shoot quickly and from far off.
Before the introduction of digital cameras three decades ago, nearly all of which have built-in zoom lenses, novice photographers usually made their next purchase a telephoto lens. They realized later it was a mistake for the family-and-friends snaps that constituted 90 percent of their photos.
What they really needed was a wide-angle lens to use in confined spaces. As an outdoors writer I often make pictures in small boats where nothing is farther away than 10 feet, and I bless my 10-17 mm wide angle that’s ideal for such tight quarters.
But it’s different when making pictures of birds and other wildlife. A 300-millimeter lens is about the shortest telephoto for this work, and even then you usually need to get within 100 feet of the subject. So in addition to having the right equipment, you have to give some thought to how to get close.
That might mean simply finding a place to sit in shadow or in the bushes and wait. Often, merely staying still is enough to avoid spooking wildlife like deer, turkeys and wading birds. A friend bought a children’s play tent for $10, dyed it olive green and uses it as a blind. He sits inside in a lawn chair and shoots through one of the open windows.
For $250 to $600, casual photographers can buy superzoom cameras with lenses that offer the equivalent of a 600-1,200-mm. telephoto on pro cameras. They also have wide-angles equivalent to 21-24 mm.
The wide lens can be great for extreme closeups, since many will focus to within a few inches of the subject. But the long telephoto also allows making closeup photographs of small things from 10-20 feet away, like the pondhawk dragonfly.
Megapixels
Eastman-Kodak invented the digital camera in 1975, an 8-pound beast that took several minutes to record a 1,000-pixel, black-and-white image on cassette tape. Unfortunately, Kodak’s management didn’t think these cameras could ever replace film and virtually gave away the digital industry to innovative Japanese firms like Canon, Nikon, Sigma and Fuji.
Pixels are like little squares of color that a computer creates on a camera’s storage medium or a TV screen. Think of them as electronic dots of paint from a very thin brush, and the more dots per square inch, the finer the image. In general terms, the more pixels a camera has, the better the picture quality, especially as it’s enlarged.
My first digital camera 25 years ago created an image with a maximum of 500,000 pixels. Today, Canon sells a pro camera that offers 50 megapixels (that’s 50 million pixels).
While lots of megapixels is good, for most amateurs it becomes overkill at about 16 megs. An image that fills the full frame of a 16 megapixel camera can produce an excellent 8-by-10 print. My 23-megapixel pro cameras will make a 16-by-24 from a full-frame, or an 8-by-10 to 12-by-16 if I enlarge only a part of the image. The higher pixel count allows me to make good prints from a smaller piece of the picture.
But don’t get caught up in the megapixel craze. A number of cameras that boast 10 megapixel sensors make lower-quality photos than some cameras with 6 megs. That’s because some higher-megapixel cameras might have inferior glass in the lenses or less sophisticated computer algorithms (software that translates the light coming into the camera into an image on the data storage card.) Find a reliable camera review website that is accessible to amateurs, such as CNet Reviews or check out these sites, to help sort out those questions.
Shutter lag
Most superzoom consumer cameras lack the many manual controls that pro photographers want, and accessing controls through the camera’s software is slow and clumsy. But the average photographer can’t be bothered with the intricacies of focusing or setting the shutter speed and lens aperture. Nor do they want to manually select the white balance or the ISO, which determines the camera’s light sensitivity.
Digital superzooms do all of those things for you, and while they can sometimes be fooled, for the most part they do a good job. The one place where they really show an Achilles heel is shutter lag, or the time that elapses between pressing the button and the picture being made.
My pro cameras make the photo instantly when the shutter button is pressed and can take five to 10 pictures a second. But the computers in consumer cameras are much less sophisticated. They need a half-second or so to think over the incoming data about light levels and focus and then make a decision.
Many people have been frustrated by that lag when trying to make pictures. I have erased literally thousands of images where a critter turned its head away during that short delay, or even ran off and left me with a photo of its butt.
There’s not much you can do about shutter lag except learn how to anticipate it or look for a camera that has the least amount. If your camera has a shutter lag time of 0.5 seconds or less, that’s generally good enough for a weekend warrior. Keep in mind, too, that sometimes the camera with a shorter lag time may not have other features you want, so it’s a compromise.
Tripods
Long lenses are fun to use, but they’re a lot harder to handhold. If you try to handhold a superzoom camera at the equivalent of a 1,000-mm lens, you’ll find it very difficult to keep the subject in the viewfinder or LCD screen.
The lens magnifies the apparent motion of the subject. If you see a deer ambling along at 3 miles an hour and look at it through a lens that offers 10X magnification, it will seem to be moving at 30 mph. At 50X it will seem to be doing 150 mph.
If you try to handhold, and your arms move up and down an inch as you breath, through the camera that movement will look like a foot.
You can get a steadier image by bracing your elbows on your chest and holding your breath. Or, if you’re fortunate enough to have a short companion, put the camera on top of their head. But, since short companions aren’t always handy, many of the long-lens images I take are made with the camera mounted on a tripod.
Decent tripods are available for lightweight cameras for under $50 (and often under $20 on Craigslist.) But take your camera along when you buy it to make sure the legs aren’t too flimsy for its weight. It also helps to have tripod legs that can be dropped and adjusted quickly.
Video
A bonus from the digital revolution is the ability to make both stills and high quality video with the same camera. And anyone who makes video will soon learn that a tripod is a necessity 90 percent of the time.
Proof of that can be seen on television news shows, where the story is accompanied by a jerky, sometimes barely-legible handheld video made on a cell phone by a shaking witness whose adrenaline level has gone through the roof.
Most cameras will also allow the photographer to make quick still photos while shooting video, and some of my best photos of birds in flight were made this way. But anyone who starts making videos will soon learn it’s a different animal than still photography, with its own set of rules. And while those rules can be learned by trial and error, there are thousands of tutorials on YouTube and other web sites that can speed up the process.
One final note about making pictures with cell phones, which can produce excellent stills and videos when used properly: it rarely makes sense to make a vertical image. Hold the phone so that it makes horizontal images, especially when making videos.
Eric Sharp is an award-winning outdoors writer whose work appeared in the Detroit Free Press for more than 20 years. Sharp has also written for the Miami Herald, Outdoor Life, Field & Stream, Sail Magazine, Yachting and The New Yorker. He is the author of two books, “Michigan Outdoor Guide” and “Fishing Michigan.”
See what new members are saying about why they donated to Bridge Michigan:
- “In order for this information to be accurate and unbiased it must be underwritten by its readers, not by special interests.” - Larry S.
- “Not many other media sources report on the topics Bridge does.” - Susan B.
- “Your journalism is outstanding and rare these days.” - Mark S.
If you want to ensure the future of nonpartisan, nonprofit Michigan journalism, please become a member today. You, too, will be asked why you donated and maybe we'll feature your quote next time!


 >
>  Eric Sharp (Courtesy photo)